I used several evidence collection tools for fast forensics to see what the differences were. I check the function mainly from the viewpoint of dumping the file. The following table shows the results in a Windows environment.
(*1, *2, *6).

- *1: What can be obtained without changing the setting.
- *2: “OK” is a dump of raw data.
- *3: Get the result of parsing.
- *4: SOFTWARE was only obtained under “Wow 6432 Node”. SAM and SECURITY had different file sizes than the original file, but the data portion was the same as the source.
- *5: Some registry files are output, for example, “Application” “Security” “System”.
- *6: Table numbers are indexes for visibility. Similar tools are arranged closer together, and the order does not imply superiority or inferiority of the tools.
I hope this will help you determine which evidence collectiing tool is a good choice for your incident response.
Evidence Collecting Tools
CDIR Collector
- CDIR/README_en.md at master · CyberDefenseInstitute/CDIR
https://github.com/CyberDefenseInstitute/CDIR/blob/master/README_en.md

How to use
- Download “CDIR Collector v 1.3 .3” from the release page.
- Run “cdir-collector.exe” on the target machine.
- Memory Dump Execution Choices Appear at Runtime.
[ MemoryDump (1: ON 2:OFF 3:EXIT) ] - Results are output to the “PCNAME_yyyymmddhhMMss” folder, which is created in the same location as the executable.
Additional Information
- Processing time: about 2 minutes
- Supportted OS: Windows
- Documents (Japanese)
Automatically Parsed Files
- Nothing
Comment
This tool can extract a lot of useful evidence from Windows. Since the memory is generated in a compressed format, the file size is smaller than the amount of physical memory. There is also a tool called CDIR Analyzer(Japanese) that can parse data from CDIR Collector.
CyLR
- orlikoski/CyLR: CyLR — Live Response Collection Tool https://github.com/orlikoski/CyLR

How to use
- Download “ CyLR 2.1.0” from the release page.
- Run “CyLR.exe” on the target machine.
- Results are output to the “PCNAME.zip” file, which is created in the same location as the executable.
Additional Information
- Processing time: about 2 minutes
- Supportted OS: Windows, Mac, Linux
Automatically Parsed Files
- Nothing
Comment
This tool can extract a lot of useful evidence from Windows. The results can be saved in a ZIP file with a password or sent via SFTP. When running the tool on Windows 7 x 64 (SP1) without any updates, I received an error if .NET Core was not installed. I was able to run the tool by applying the latest Windows update (2019/07).
Failed to load the dll from [C:\Users\username\AppData\Local\warp\packages\CyLR.exe\hostfxr.dll], HRESULT: 0x80070057
The library hostfxr.dll was found, but loading it from C:\Users\username\AppData\Local\warp\packages\CyLR.exe\hostfxr.dll failed
  - Installing .NET Core prerequisites might help resolve this problem.
     https://go.microsoft.com/fwlink/?LinkID=798306&clcid=0x409
Live Response Collection - Cedarpelta
- BriMor Labs — Tools
https://www.brimorlabs.com/tools/

How to use
- Download “ Live Response Collection” from the release page.
- Run “Windows_Live_Response\Windows Live Response Collection.exe” on the target machine.
- Select “Triage” at the bottom of the screen.
(Select “Memory Dump” if you also want to get a Memory dump too.) - Results are output to the “COMPUTERNAME_date_hhMMss” folder, which is created in the same location as the executable.
Additional Information
- Processing time: about 2 minutes
- Supportted OS: Windows、Mac、*nux
- Documents (Blog)
Automatically Parsed Files
All_logons_wmic.txt
DiskDriveList_wmic.txt
Driver_group_load_order_wmic.txt
Full_file_listing.txt
Hashes_md5_Startup_and_Dates.txt
Hashes_md5_System32_AllFiles_and_Dates.txt
Hashes_md5_System_TEMP_AllFiles_and_Dates.txt
Hashes_md5_User_TEMP_AllFiles_and_Dates.txt
Hashes_sha256_Startup_and_Dates.txt
Hashes_sha256_System32_AllFiles_and_Dates.txt
Hashes_sha256_System_TEMP_AllFiles_and_Dates.txt
Hashes_sha256_User_TEMP_AllFiles_and_Dates.txt
Installed_software_wmic.txt
LastActivityView.html
List_hidden_directories.txt
Loaded_dlls.txt
Loaded_system_drivers_wmic.txt
LogicalDisk_name_wmic.txt
LogicalDisk_size_caption_wmic.txt
NetBIOS_sessions.txt
Possible_unicode_files_and_directories.txt
PrcView_extended.txt
PrcView_extended_long.txt
PsList.txt
PsLoggedon.txt
PsLoglist.txt
Running_processes.txt
Startup_wmic.txt
TCPView.txt
Windows_Version.txt
Windows_codepage.txt
autorunsc.csv
autorunsc.txt
cports.html
nbtstat.txt
netstat_anb_results.txt
psfile.txt
psinfo.txt
scheduled_tasks.txt
services_aw_processes.txt
system_date_time_tz.txt
system_info.txt
system_info_wmic.txt
whoami.txt
Comment
This tool can extract a lot of useful evidence from Windows. It also supports multiple operating systems. It is too difficult for me to unravel the relationship between the output folder name and the date.
FastIR Collector
- SekoiaLab/Fastir_Collector
https://github.com/SekoiaLab/Fastir_Collector
How to use
- Download “ FastIR_x64.exe” (or “FastIR_x86.exe”) from the release page.
- Run “fastIR_x64.exe --packages fs,evt,health,registry,memory,dump,FileCatcher” from a command prompt on the target machine.
- Results are output to the “output\yyyy-mm-dd_hhMMss” folder, which is created in the same location as the executable.
Additional Information
Automatically Parsed Files
Filecatcher.csv
USBHistory.csv
arp_table.csv
bootLoaderAssemblyCode.txt
chrome_history.csv
clipboard.csv
custom_registry_keys.csv
firefox_history.csv
hash_processes.csv
installed_components.csv
installer_folder.csv
kb.csv
list_drives.csv
list_networks_drives.csv
mft_C.csv
named_pipes.csv
network_list.csv
opensaveMRU.csv
prefetch.csv
processes.csv
processes_dll.csv
processes_opened_files.csv
recent_docs.csv
recycle_bin.csv
registry_services.csv
results.txt
routes_tables.csv
run_MRU_start.csv
scheduled_jobs.csv
services.csv
sessions.csv
shares.csv
shellbags.csv
sockets.csv
startup.csv
startup_files.csv
user_assist.csv
vbr.txt
vbr_AssemblyCode.txt
windows_values.csv
winlogon_values.csv
Comment
This tool can extract a lot of useful evidence from Windows. A single executable provides all the functionality.
DG Wingman
- Introducing DG Wingman, a Free Forensics Tool | Digital Guardian
https://digitalguardian.com/blog/introducing-dg-wingman-free-forensics-tool

How to use
- Click “Submit” on the release page
- You will receive an email with a download link after you enter the required information.
- Run “ wingman.exe” on the target machine.
- For example, enter the following command.
wingman.exe -p 0 -ph -s -r -b -bf ".\BrowserHistoryFiles.dat" -e -nj 1000 - Results are output to the “EDR” folder, which is created in the same location as the executable
Additional Information
- Processing time: about 4minutes
- Supportted OS: Windows
- Documents
Automatically Parsed Files
dep_info.txt
ether_adapter_info.txt
evtlog_security__EventID_4624_.txt
evtlog_security__EventID_4625_.txt
evtlog_security__EventID_4634_.txt
evtlog_security__EventID_4648_.txt
evtlog_security__EventID_4688_.txt
evtlog_security__EventID_4723_.txt
evtlog_security__EventID_4776_.txt
evtlog_security__EventID_4779_.txt
ipconfig.txt
named_objects.txt
routing_table_netstat-r.txt
SCHEDLGU.TXT
schtasks.txt
systeminfo.txt
uac_info.txt
wfp_info.txt
activedata.json
metadata.json
RegistryInfo.json
staticdata_2019-09-01_20-04_41_136.json
staticdata_2019-09-01_20-04_42_556.json
staticdata_2019-09-01_20-04_47_236.json
staticdata_2019-09-01_20-04_52_711.jsonetc.
triage-ir
- Google Code Archive - Long-term storage for Google Code Project Hosting.
https://code.google.com/archive/p/triage-ir/
How to use
- Download “TriageIR v.85.zip” from the release page.
- Run “ Triage Incident Response.exe” on the target machine.
- Select “Yes” when prompted to download Sysinternals Toolset.
- Select “OK” to display a dialog before expanding Sysinternals Toolset.
- Results are output to the “yyyymmddhhMMss - COMPUTERNAME Incident” folder, which is created in the same location as the executable.
Additional Information
- Processing time: about 5 minutes
(Include Sysinternals Toolset download time) - Supportted OS: Windows
Automatically Parsed Files
ARP Info.txt
Account Details.txt
All Users_JumpList_Auto_Copy.txt
All Users_JumpList_Custom_Copy.txt
All Users_Recent_Copy.txt
Application Log.csv
AutoRun Info.csv
AutoRun Info.txt
DNS Info.txt
Default User_JumpList_Auto_Copy.txt
Default User_JumpList_Custom_Copy.txt
Default User_Recent_Copy.txt
Default_JumpList_Auto_Copy.txt
Default_JumpList_Custom_Copy.txt
Default_Recent_Copy.txt
Directory Info.txt
Disk Mounts.txt
Event Log Copy.txt
Handles.txt
Hostname.txt
IP Info.txt
Incident Log.txt
LocalShares.txt
NBTstat.txt
NTFS Info.txt
Network Connections.txt
Open Shared Files.txt
Prefetch Copy Log.txt
Processes.txt
Public_JumpList_Auto_Copy.txt
Public_JumpList_Custom_Copy.txt
Public_Recent_Copy.txt
Routes.txt
Scheduled Tasks.txt
Security Log.csv
Services.txt
Sessions.txt
Start Up WMI Info.txt
System Info.txt
System Log.csv
System Variables.txt
Volume Info.txt
Workgroup PC Information.txt
Username_JumpList_Auto_Copy.txt
Username_JumpList_Custom_Copy.txt
Username_Recent_Copy.txt
Comment
The latest version “TriageIR v.851.zip” did not work in some environments. Sysinternals Toolset is required for execution. If it is not present at runtime, you will be asked to allow it to be downloaded. I found it a little strange that some CSV files were not separated by commas.
REC (free edition)
- IREC - IR Evidence Collector | Binalyze
https://binalyze.com/products/irec

How to use
- Click “Download Free Edition” on the release page
- You will receive an email with a download link after you enter the required information.
- Run “IREC-1.8.0.exe” on the target machine
- Confirm that “Collect Evidence” is selected, then click Start at the bottom.
- Results are output to the “Case\yyyymmddhhMMss-COMPUTERNAME” folder, which is created in the same location as the executable
- You can view the report from “Open HTML Report” at the end of the analysis.
Additional Information
- Processing time: about 2 minutes
- Supportted OS: Windows
- Documents
Automatically Parsed Files
Case.htmlComment
The result reporter is output as HTML. You can collect not only memory dump but also page file dump. The free version cannot collect some file dumps including MFT. Some environments did not display HTML reports well.
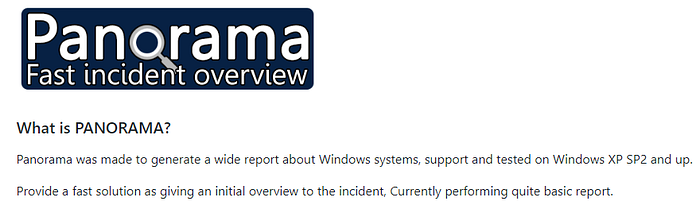
Panorama
- AlmCo/Panorama: Fast incident overview
https://github.com/AlmCo/Panorama
How to use
- Download from github
- Run “Panorama.exe” on the target machine
- Click Report on the right side of the screen that appears.
- Extract results to “C:/Windows/TEMP/Panorama/Panorama.html”
- Default web browser automatically launches at the end of analysis and displays report in HTML format
Additional Information
- Processing time: about 1 minutes
- Supportted OS: Windows
- Documents
Automatically Parsed Files
FilesPanorama.html
Panorama.html
usbdeview.html
Comment
A tool for collecting information about a system without privilege elevation. It is not a tool designed for incident response. The result is output in HTML format. It’s interesting that the tool has a button for hibernation. If you click it, however, it will be hibernated without confirmation.
Other Tools (not tried)
- jipegit/FECT
https://github.com/jipegit/FECT
Reason: It needs to be compiled. - Viralmaniar/Remote-Desktop-Caching-
https://github.com/Viralmaniar/Remote-Desktop-Caching-
Reason: Python is required. - Silv3rHorn/ArtifactExtractor
https://github.com/Silv3rHorn/ArtifactExtractor
Reason: Python is required. - diogo-fernan/ir-rescue
https://github.com/diogo-fernan/ir-rescue
Reason: I couldn’t run it. - OMENScan/AChoir
https://github.com/OMENScan/AChoir
Reason: Installation is required. - VMDK Forensic Artifact Extractor (VFAE)
https://sourceforge.net/projects/vfae/
Reason: For .vmdk files. - orlikoski/CDQR
https://github.com/orlikoski/CDQR
Reason: For image files. - simsong/bulk_extractor:
https://github.com/simsong/bulk_extractor
Reason: It’s more a tool for deep forensics than fast forensics. - Computer Account Forensic Artifact Extractor
https://tzworks.net/prototype_page.php?proto_id=19
Reason: For registry hive only. - CrowdResponse
https://www.crowdstrike.com/resources/community-tools/crowdresponse/
Reason: Configuration is required for file dump. - Free Trial — Magnet Forensics
https://www.magnetforensics.com/free-trial/?magnet-product=Magnet%20IEF&option=free-trial
Reason: Application for use is required. - Kroll Artifact Parser and Extractor — KAPE
https://www.kroll.com/en/insights/publications/cyber/kroll-artifact-parser-extractor-kape
Reason: Application for use is required.
References
- meirwah/awesome-incident-response: A curated list of tools for incident response
https://github.com/meirwah/awesome-incident-response#timeline-tools - ForensicArtifacts/artifacts: Digital Forensics Artifact Repository
https://github.com/ForensicArtifacts/artifacts - Digital Forensics Guidelines, 7th Edition | NPO Institute of Digital Forensics (Japanese)
https://digitalforensic.jp/wp-content/uploads/2018/08/guideline_7.1st.pdf
Appendix
A tool that generates artifacts as if the machine was compromised.
- NextronSystems/APTSimulator: A toolset to make a system look as if it was the victim of an APT attack
https://github.com/NextronSystems/APTSimulator
Update History
- 2019/06/21 New.
- 2019/07/14 Added CyLR. Added *5 as an explanation of the table.
- 2019/09/01 Added DG Wingman.
- 2020/03/03 Revised.